How to Fix Cracked Cement Patio: A Comprehensive Guide
Fixing a cracked cement patio is a common issue that many homeowners face. From understanding the causes of cracks to learning the repair methods, this guide will walk you through the process step by step. Whether you're dealing with small cracks or larger holes, this comprehensive overview will equip you with the knowledge and tools needed to restore your patio to its former glory.
As we delve into the different types of cracks, preparation for repair, various methods of fixing them, and finishing touches, you'll discover valuable insights to help you tackle this project effectively.
Understanding the Issue

Cracked cement patios are a common problem faced by homeowners, and understanding the causes and risks associated with them is essential for proper maintenance.
Common Causes of Cracked Cement Patios
There are several factors that can lead to cracks in cement patios, including:
- Poor installation techniques
- Excessive weight or pressure on the surface
- Freeze-thaw cycles
- Settling of the ground beneath the patio
Types of Cracks
Cracks in cement patios can vary in size, shape, and severity. Some common types include:
- Hairline cracks: Small, thin cracks that are usually superficial
- Shrinkage cracks: Caused by the drying and curing process of concrete
- Settlement cracks: Resulting from the patio settling unevenly
Potential Risks of Leaving Cracked Cement Unrepaired
Leaving cracked cement patios unrepaired can lead to various issues, such as:
- Water seepage into the foundation, causing structural damage
- Trip hazards for individuals walking on the patio
- Aesthetically unpleasing appearance of the outdoor space
Preparation for Repair
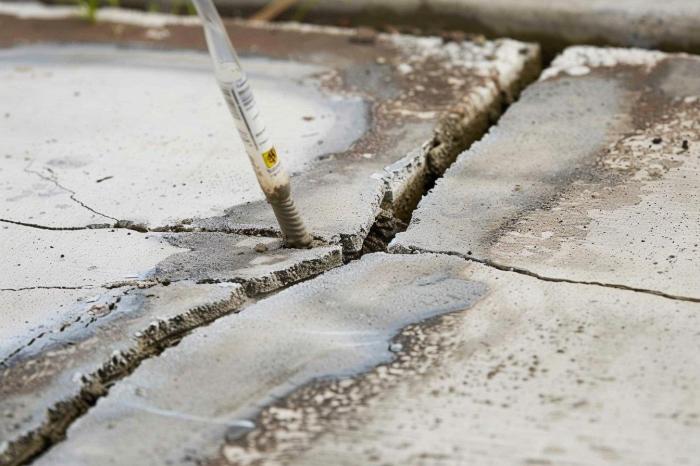
When it comes to fixing a cracked cement patio, proper preparation is crucial to ensure a successful repair. This includes gathering the necessary tools and materials, cleaning the area thoroughly, and assessing the extent of the damage.
Tools and Materials Needed
Before starting the repair process, make sure you have the following tools and materials on hand:
- Concrete patching compound
- Protective gear (gloves, goggles, mask)
- Trowel
- Wire brush
- Chisel
- Broom
- Pressure washer
- Concrete sealer
Importance of Cleaning the Area
Cleaning the cracked cement patio is essential before making any repairs. Dirt, debris, and loose particles can interfere with the bonding of the patching compound, leading to a weak repair. Use a broom to sweep the area and a pressure washer to remove any stubborn stains or dirt.
Allow the surface to dry completely before proceeding with the repair.
Assessing the Extent of Damage
To determine the appropriate repair method, assess the severity of the cracks on your cement patio. Minor hairline cracks can be filled with a simple patching compound, while larger or deeper cracks may require more extensive repairs. Use a chisel and wire brush to clean out any loose debris from the cracks and evaluate the depth and width of each crack.
This will help you choose the right approach to effectively fix the damage.
Repair Methods

When it comes to fixing cracked cement patio, there are different methods you can use depending on the size of the crack or hole. Small cracks can easily be filled with DIY solutions, while larger cracks or holes may require professional services.
Let's explore the step-by-step process for filling small cracks, techniques for repairing larger cracks or holes, and compare the use of DIY repair kits versus professional services.
Filling Small Cracks
To repair small cracks in your cement patio, follow these simple steps:
- Clean the crack with a wire brush to remove any debris or loose cement.
- Apply a concrete patching compound with a trowel, ensuring it fills the crack completely.
- Smooth out the surface with a putty knife and let it dry according to the manufacturer's instructions.
- Once dry, sand down any excess patching compound for a smooth finish.
Repairing Larger Cracks or Holes
For larger cracks or holes in your cement patio, consider the following techniques:
- Use a concrete mix to fill the crack or hole, ensuring it is slightly above the surface to account for shrinkage.
- Smooth out the surface with a trowel and let it dry for the recommended time.
- Sand down any rough edges and apply a concrete sealer to protect the repaired area.
DIY Repair Kits vs. Professional Services
When deciding between DIY repair kits and professional services, consider the following:
- DIY repair kits are cost-effective and convenient for small cracks, but may not provide a long-lasting solution for larger repairs.
- Professional services ensure a high-quality repair for larger cracks or holes, with the expertise to handle any patio damage effectively.
- Consider the size and severity of the crack or hole, as well as your skill level, before choosing between a DIY repair kit or professional services.
Finishing Touches

After repairing the cracked cement patio, it's important to focus on the finishing touches to ensure a seamless look and long-lasting durability.
Smoothing Out the Repaired Area
- Use a trowel to smooth out any rough edges or uneven surfaces in the repaired area.
- Apply a thin layer of cement mixture to fill in any gaps or imperfections, then smooth it out with the trowel for a uniform finish.
- Allow the repaired area to dry completely before proceeding to the next step.
Coloring or Staining Options
- Consider using a concrete stain or dye to color the repaired section to match the existing patio. Make sure to follow the manufacturer's instructions for best results.
- If staining the entire patio, ensure the repaired area is blended in seamlessly to maintain a cohesive look.
- Alternatively, you can use a concrete paint to add a pop of color or create a decorative pattern on the repaired section.
Importance of Sealing the Repaired Area
- Sealing the repaired area is crucial to protect it from water damage, staining, and wear and tear over time.
- Choose a high-quality concrete sealer suitable for outdoor use and apply it according to the manufacturer's instructions.
- Regularly reseal the repaired section as part of your patio maintenance routine to ensure its longevity and appearance.
Closing Summary

In conclusion, fixing a cracked cement patio is a manageable task with the right approach and tools. By following the guidelines Artikeld in this guide, you can revitalize your patio and enhance the overall aesthetics of your outdoor space. Don't let cracks dampen your patio's appeal—take action today and enjoy a rejuvenated outdoor area for years to come.
Query Resolution
What are the common causes of cracked cement patios?
Cracked cement patios can result from factors like freeze-thaw cycles, poor installation, or underlying soil issues.
How do I assess the extent of damage before repairing?
You can evaluate the severity of cracks by measuring their width and depth, which helps determine the appropriate repair method.
Is it necessary to seal the repaired area?
Sealing the repaired area is crucial to protect it from water damage, prolonging the longevity of the fix.